

AR with SceneKit and Metal
8 Dec 2020
Recently I found myself needing to process and visualize both point clouds and meshes in an iOS application utilizing ARKit, with the point cloud being gathered using the 2020 iPad “LiDAR” sensor. To enable maximum performance and content creation convenience I thought it would be nice to have both custom shaders and a regular, easy-to-work-with 3D hierarchy available. The best options available seemed to be Metal and SceneKit, which required some initial setup to get working together. That setup is detailed in this post.
If all this sounds unfamiliar see here, here and here for introductions to these technologies.
To help you recreate what I did, the post is accompanied by a GitHub repository showing the specifics: github.com/emllnd/ar-with-scenekit-and-metal.
Note that the repo uses slightly confusing naming. XCode project name is “smTest” (for “SceneKit Metal test”), which leads to combinations such as smTestTest for the auto-generated unit testing project… not the best choice, but bear with me.
Also note that this is not really beginner level stuff, nor is having both SceneKit and Metal rendering usually required. If you just want to do some 3D+AR on iOS, good tech to start with would likely be either RealityKit+RealityComposer, the more widely applicable tool Unity or just plain SceneKit.
RealityKit seems like the future, but I was interested in custom shaping of meshes at runtime with e.g. geometry shaders and there did not (yet?) seem to be hooks for integrating that kind of processing in RealityKit.
Turns out those hooks do exist in SceneKit, which is an older and more mature technology. They can be used to implement custom render steps either before or after regular rendering. A helpful blog post with details that aided me with the ’renderer didRenderScene’ hook can be found here: Custom Metal Drawing in SceneKit. Thanks for the writeup Mr. Ippel!
I chose to get started with combining ARKit, SceneKit and custom Metal rendering by mashing two of Apple’s example applications together:
- The Scene Depth demo app (Visualizing a Point Cloud Using Scene Depth)
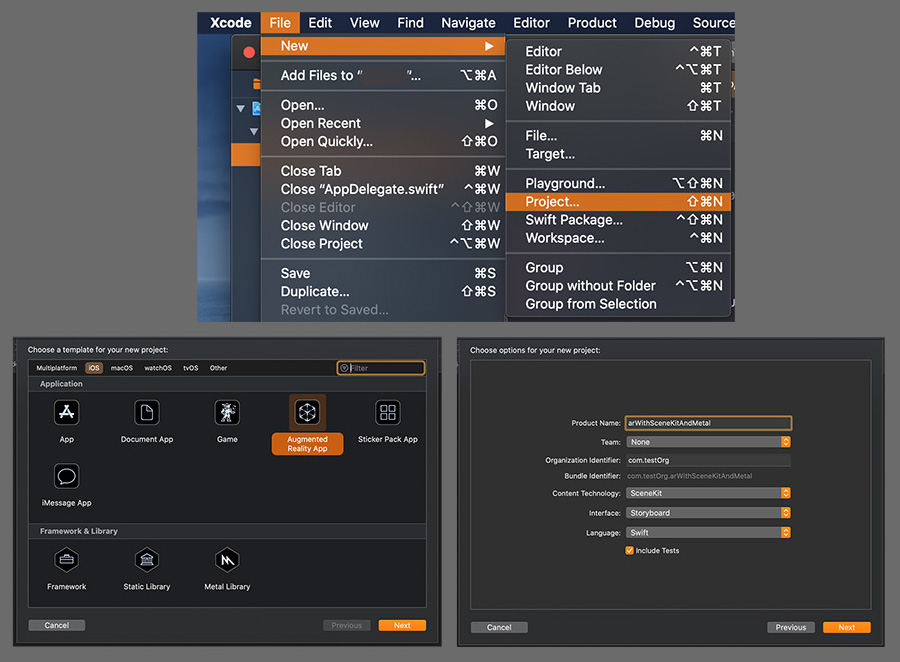
- The default SceneKit AR project created by the XCode project wizard (creation steps depicted below)
The trickiest part was to get the depth blending working correctly. SceneKit and the custom Metal renderer of the Point Cloud demo use different depth buffer conventions, which caused a few moments of initial confusion before realizing I would have to adjust depth settings to make them compatible.
Initial depth buffer ranges (from memory, might be incorrect):
SceneKit:
- empty = zero
- growing towards camera
- range around 0.00-0.05
SceneDepthPointCloud Metal renderer
- empty = negative infinity(?)
- shrinking towards camera
- range around 1.0-9.9995
To make the depth blending behave nicely and consistently, it was needed to set the proper depth blending mode (shown as DepthStencilState —> DepthCompareFunction in the XCode Frame Debugger), to find matching value ranges for both depth buffers and to keep the 3D scenes of both renderers in their respective camera frustums (having good values for znear and zfar) so that they would not get culled off by being too near or too far.
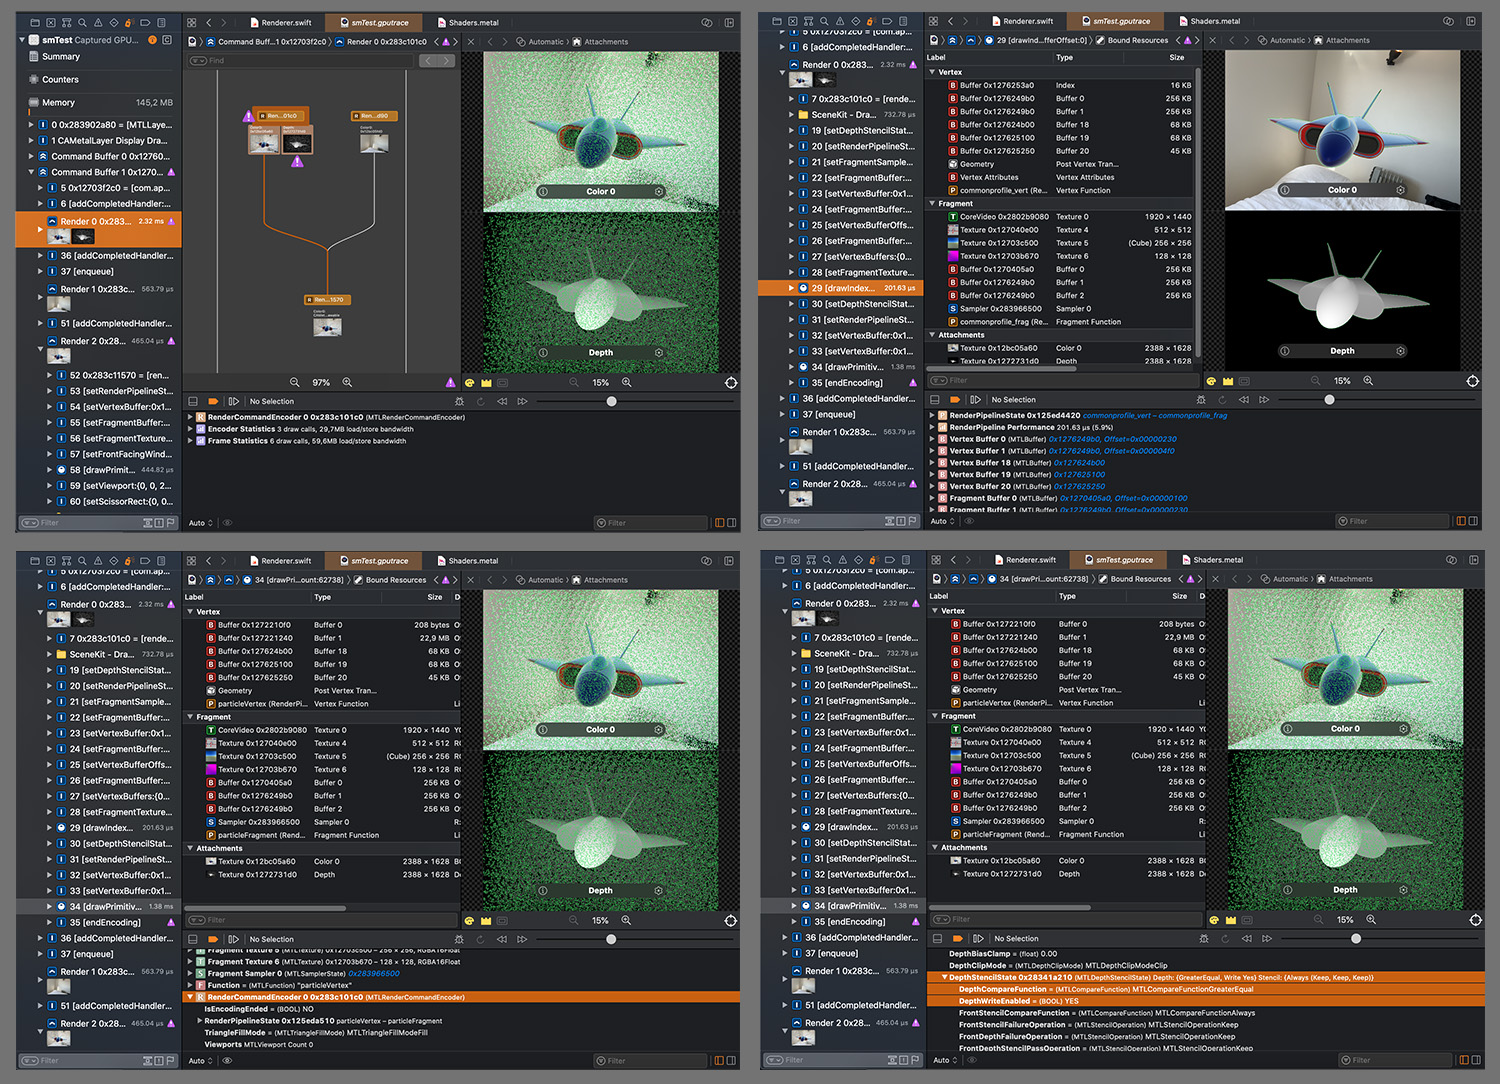
If you’re working in a recent Apple dev environment in a fairly empty project, there’s a good chance you can get started with GPU debugging right away. You just need to build and run your app and press the camera icon (and wait a bit):

(from here: Viewing Your Frame Graph)
If you crave more in-depth GPU debug options or have trouble getting started, more info can be found on the page about Frame Capture Debugging Tools as well as the guide page for Enabling Frame Capture.
For more specific details on how I combined the two renderers, see the changes included in the first few commits (Nov 24th & 28th) on the commits page of the example repository. It shows the history of how I:
- started with a blank SceneKit AR project using the Project Wizard (Initial commit)
- added custom Metal rendering as per Mr. Ippel’s post (draws simple triangle, …)
- copied in the SceneDepthPointCloud demo and made sure the application still builds (builds with SceneDepthPointCloud …)
- fiddled with accumulation settings etc confusedly to get the thing closer to working (almost works …)
- and finally adjusted the depth blending, depth range and camera frustum settings to be able to see both scenes together (improved …, draws both …)
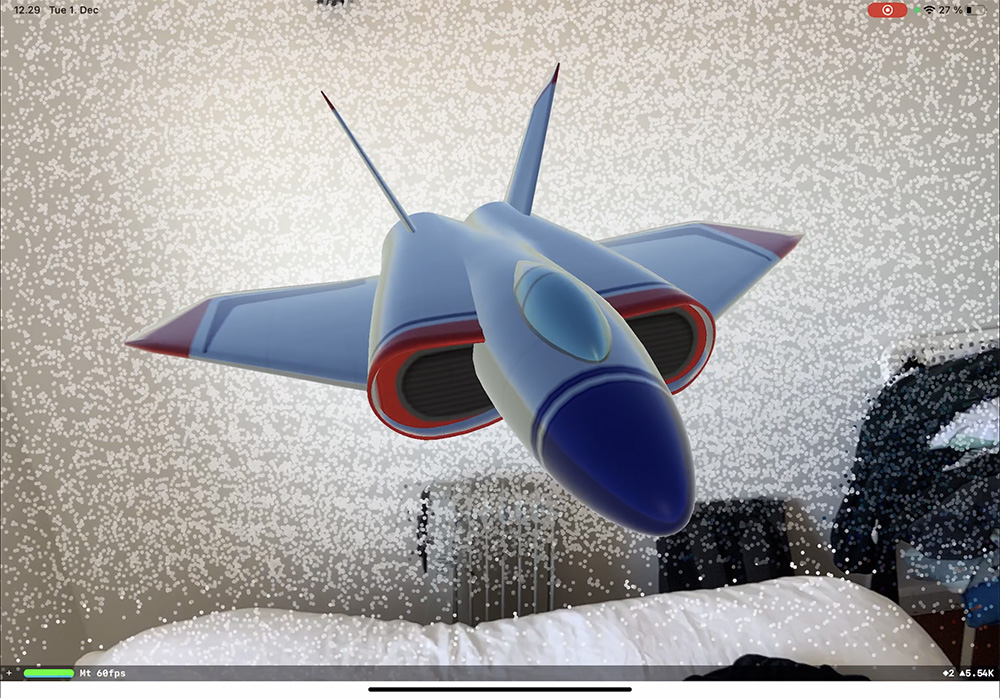
The end result of all these steps can be seen in motion below. It is of course merely the starting point for a more interesting application that leverages the ease and speed of regular 3D asset workflows and selectively applies the power of customized GPU processing as needed.
At the time of first publication of this post (Dec 2020) I’m not sure if the depth buffer is entirely in sync between the two renderers, even though they both do render simultaneously. The point cloud looks alright behind the rocketplane(? 😄), but I’m not sure whether they behave correctly in overlap situations. However, the fix should be just a matter of adjusting camera and depth buffer parameters and possibly scene scale (famous last words…).
If and when time permits, I will update the post and the repository with improved details.
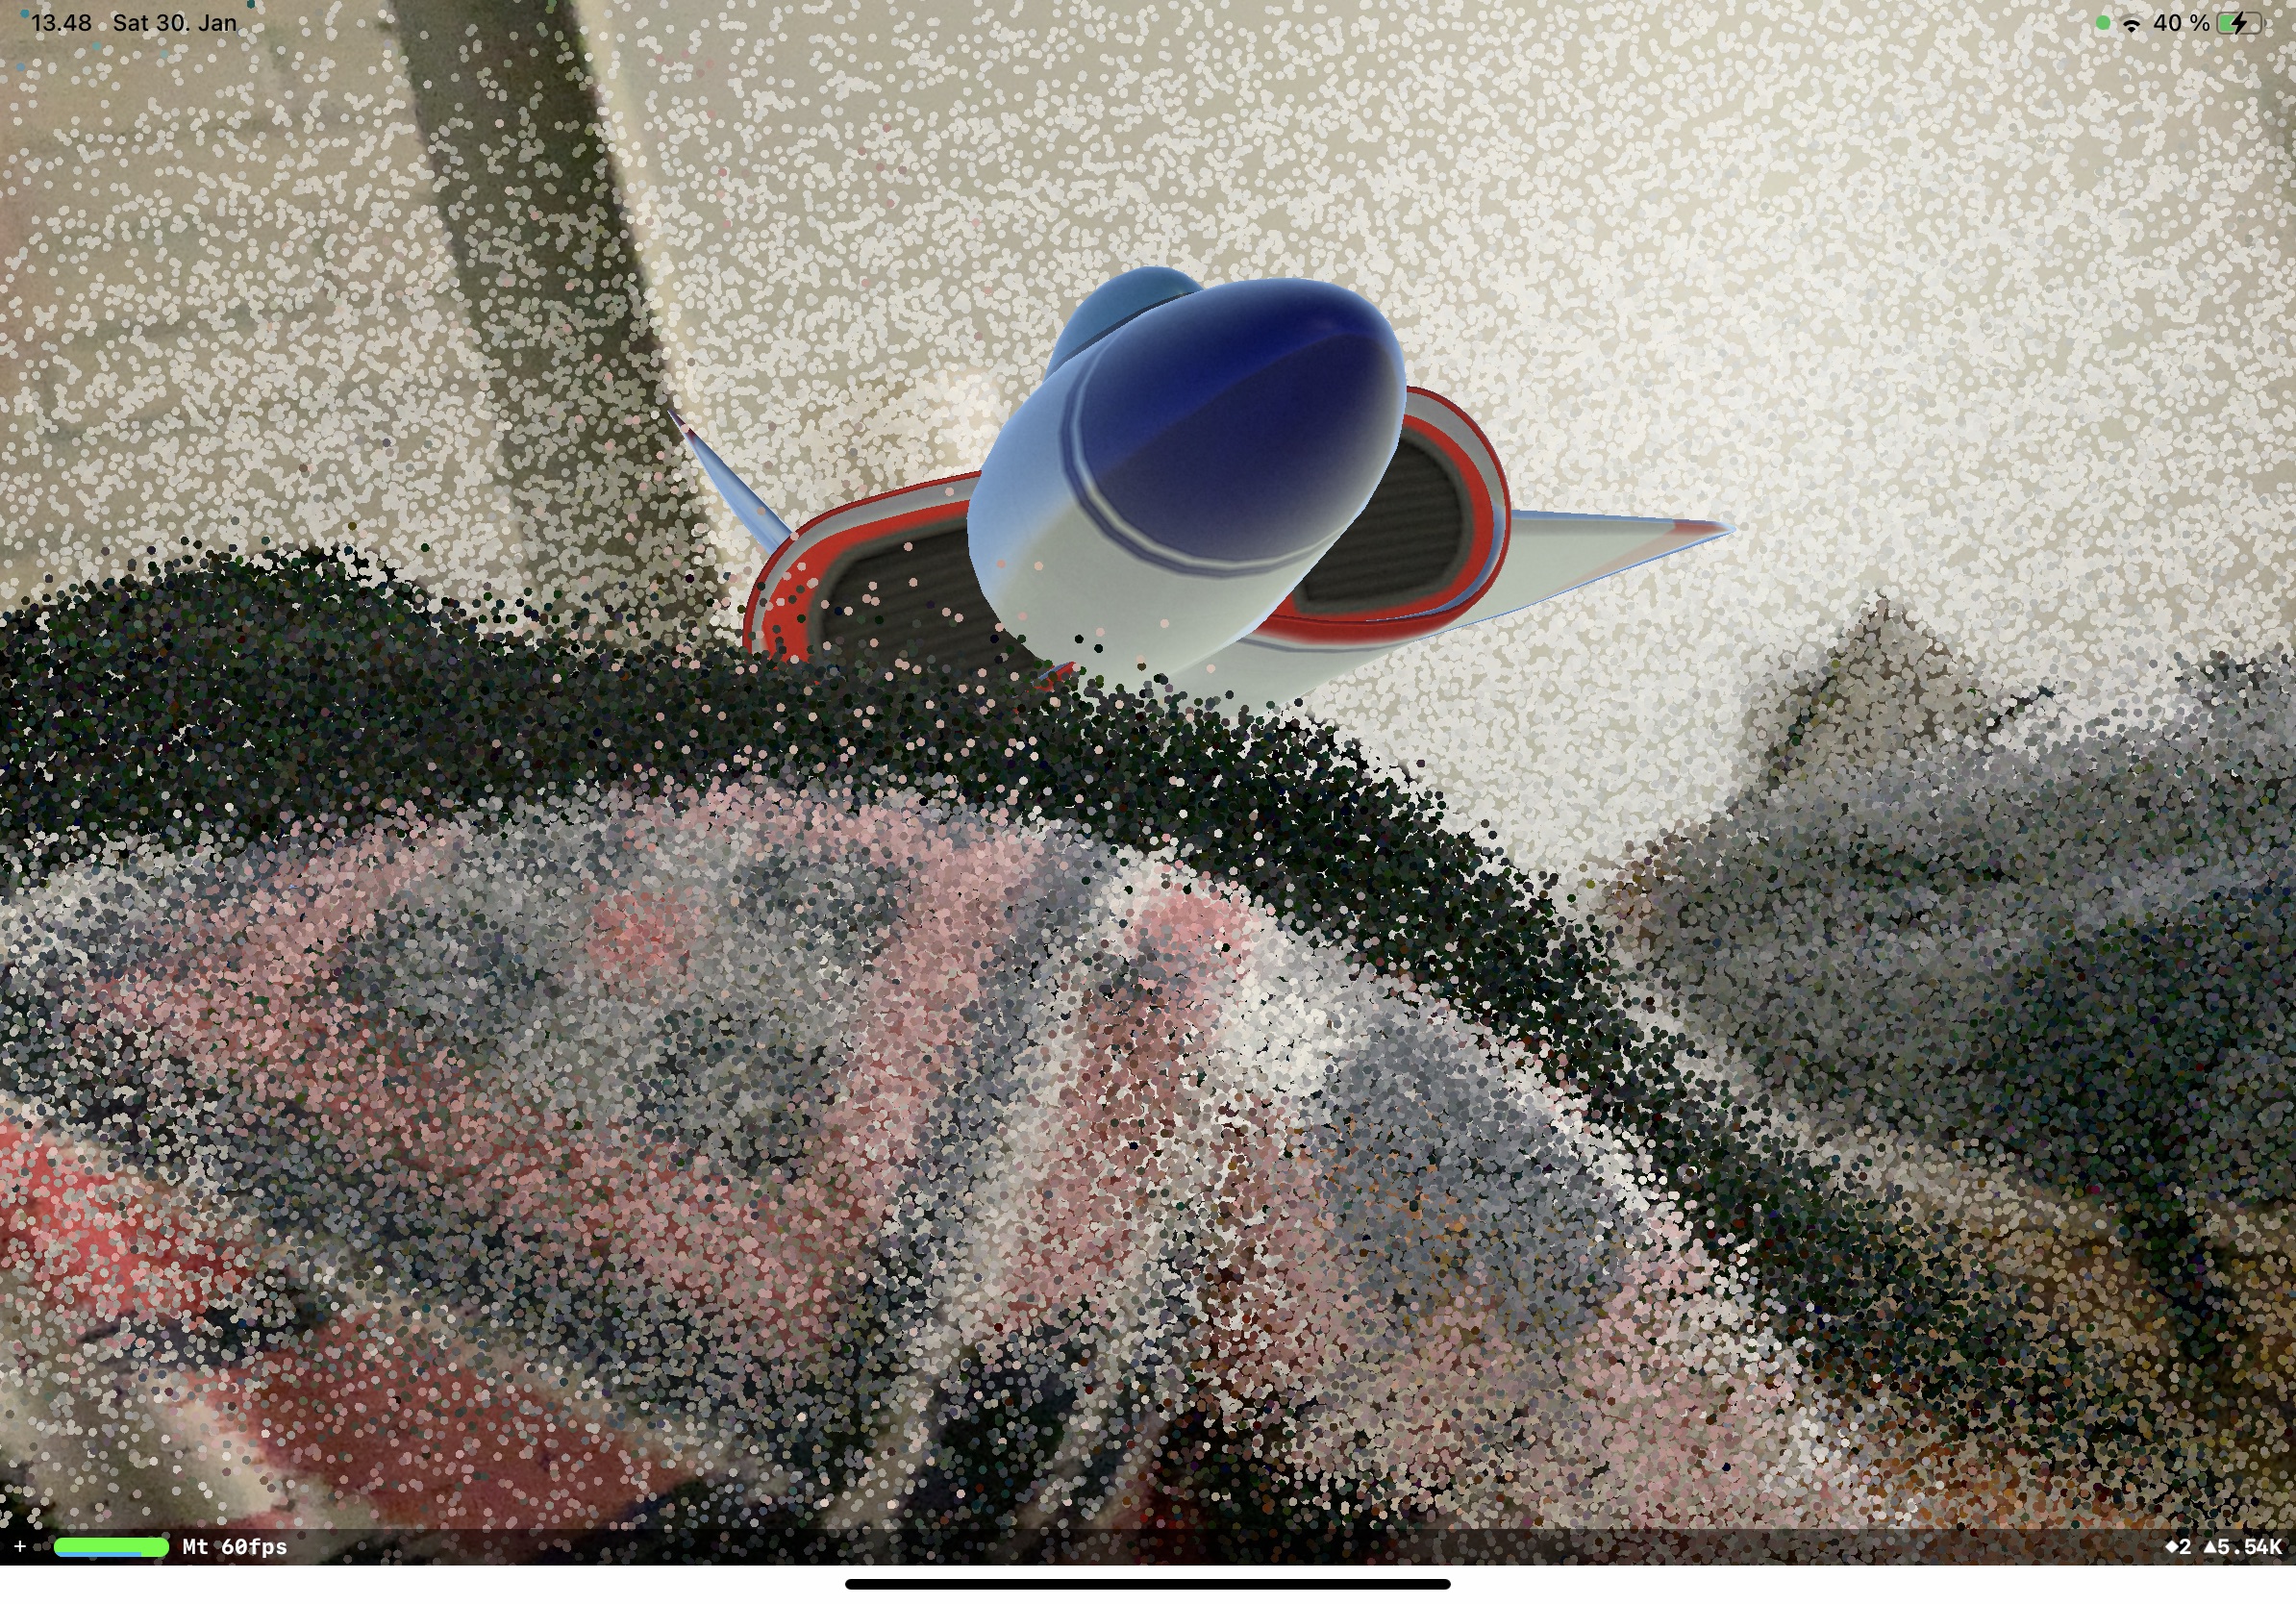
UPDATE 2021-01-30: Found and corrected the issue with the depth buffer. Basically, I was trying to manipulate the depth buffer value range by moving vertices toward/away from camera in the vertex shader. But the vertices were already in the right spot in space, instead I was supposed to scale the depth values they produce in the depth texture. Took some digging to understand how to do that in the fragment shader, but hey, found it and it works!
Code here: fix depth buffer mismatch ….
Thanks for reading!